The Prototype
Start of the Prototype
08-16-2025 - Yesterday was my last day working for the company that I had been with for the last 7 years. This also marked the end of supporting software that I helped create 27 years ago. So I think I do a pretty good job at building software, now I am putting those same work ethics and principals into Webb Punt Boats.
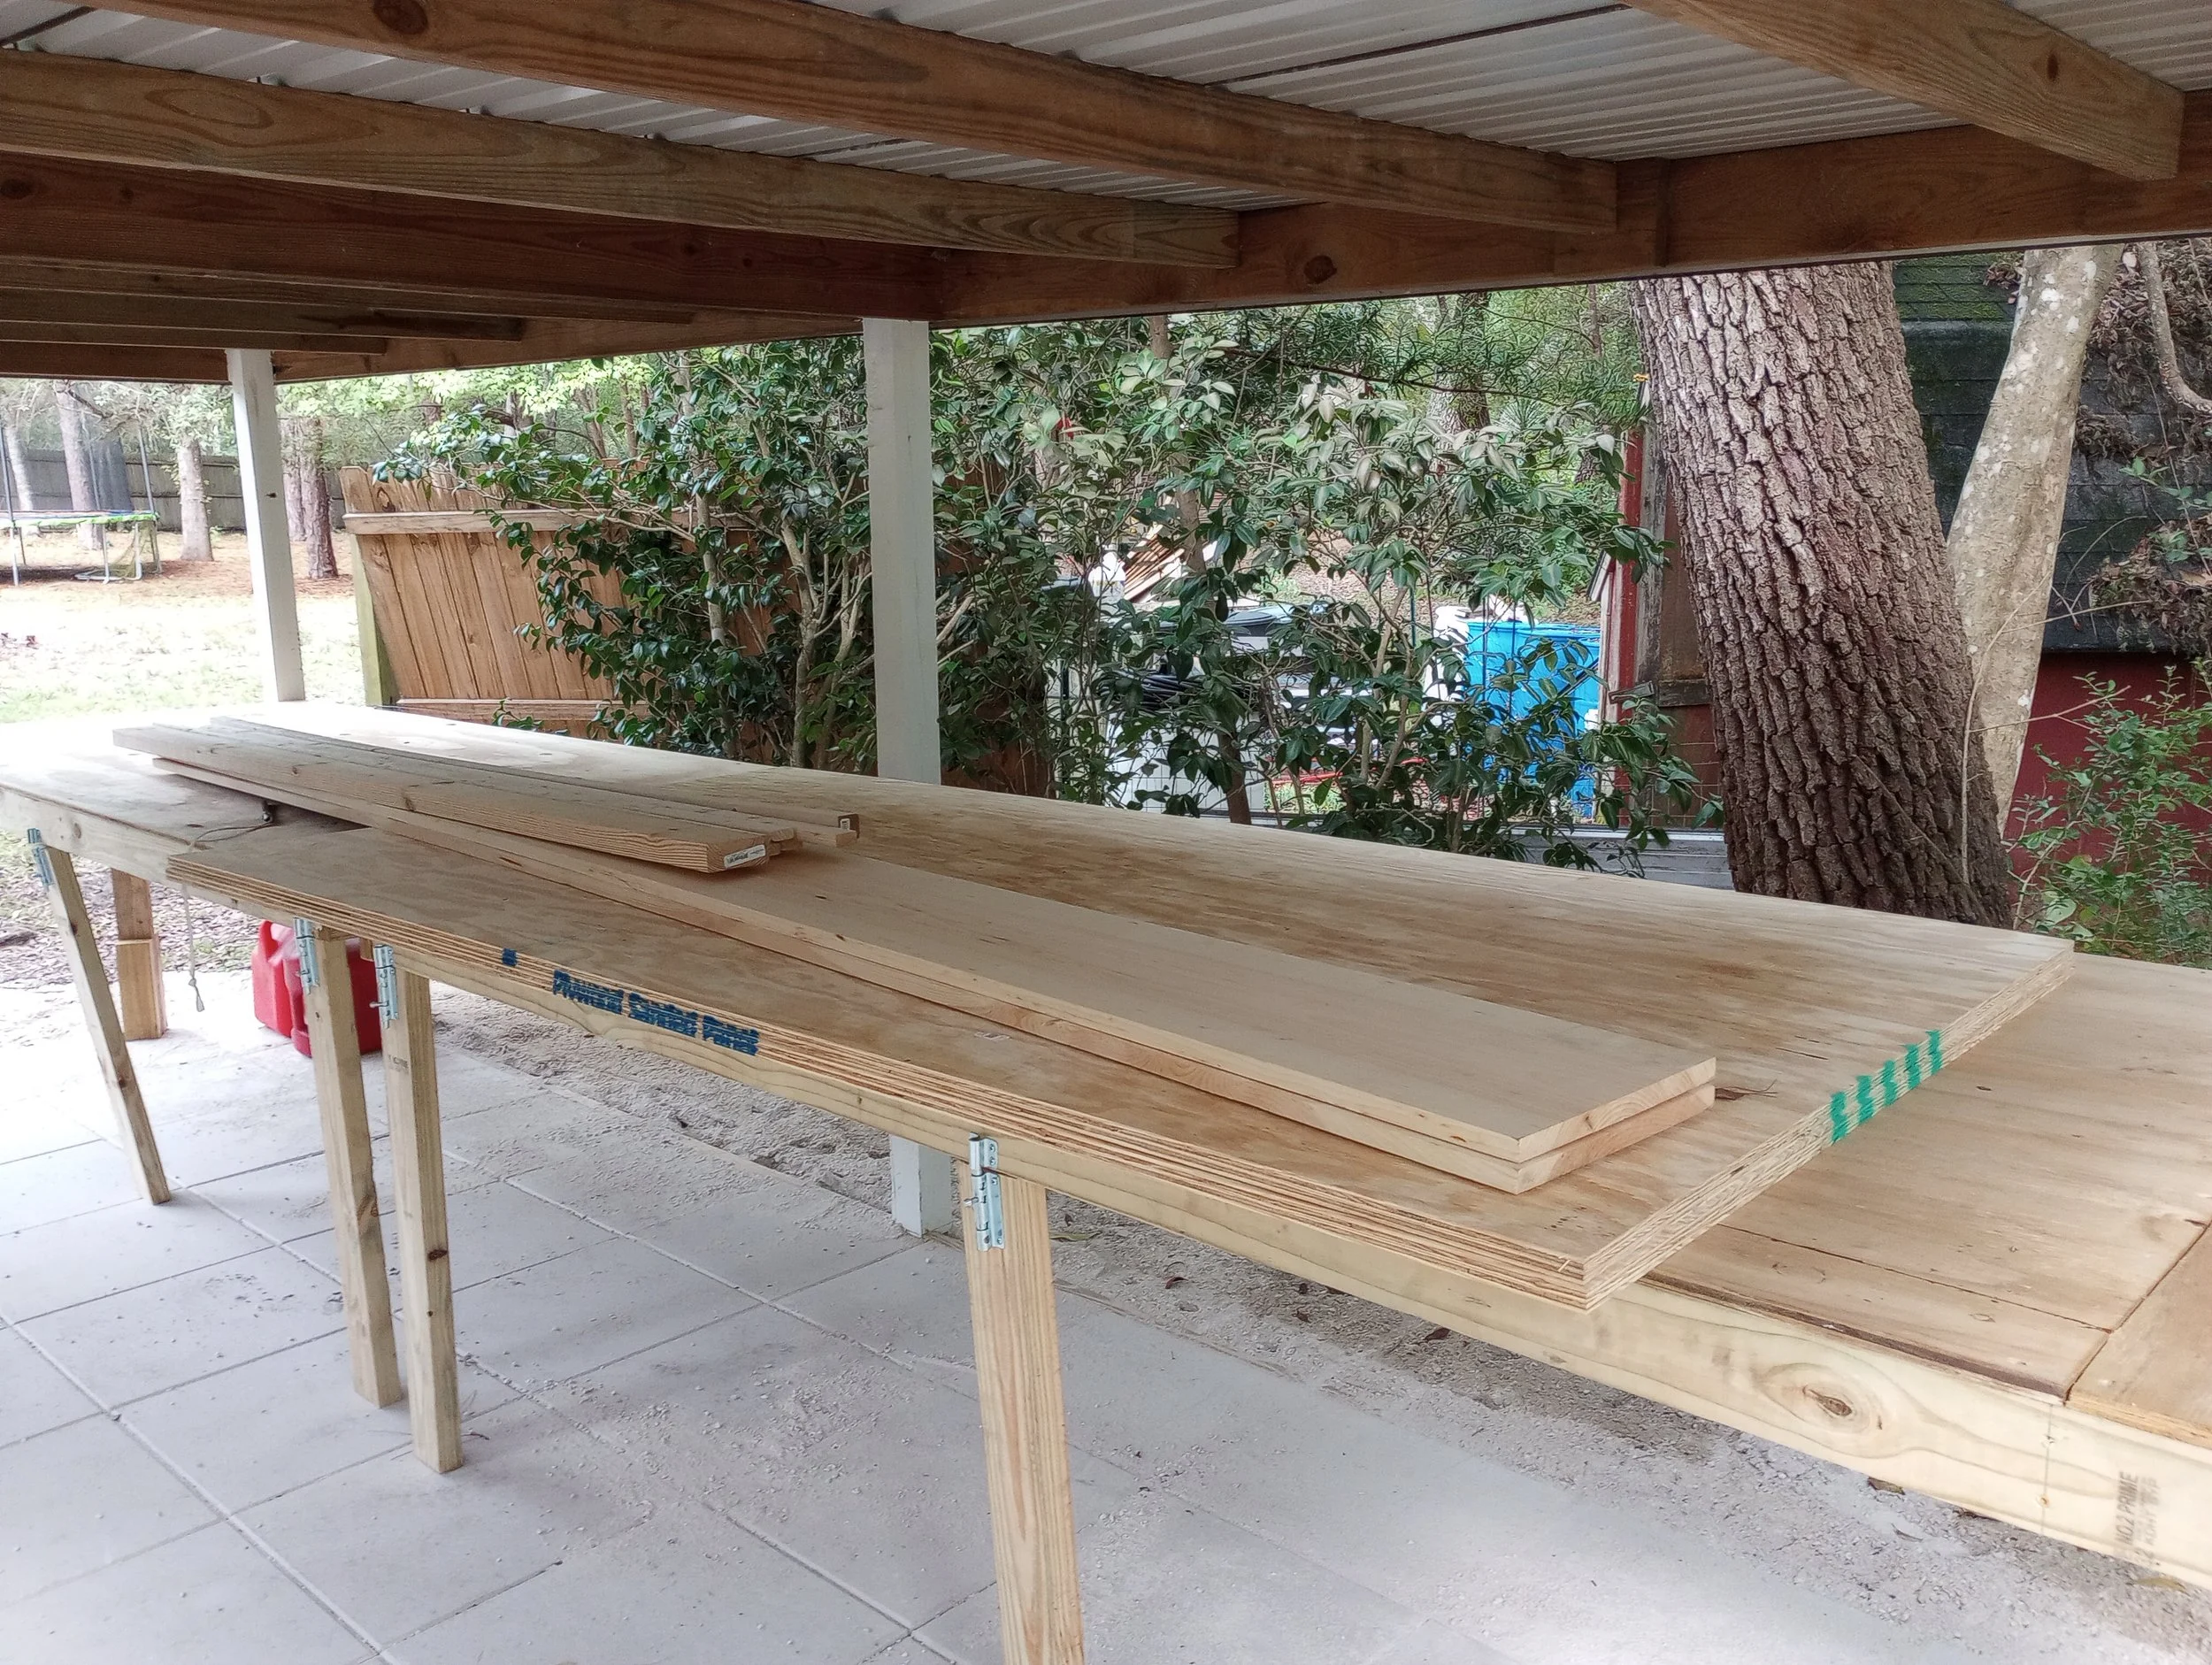
Today, I started the prototype. The first step was to get the lumber. The lumber for the prototype is not the same type of lumber that will be used for the production version. The prototype is to set up size, fit, and function. I will be able to put together, take apart, adjust placement and plan out hardware. The lumber for production boats will be marine grade lumber, marine grade paint, screws, glue, and other hardware. I am still waiting on my tools to arrive. They should start arriving this week.
08-17-2025 - Not much needed to be done today. I mainly worked on filling in the gaps between the pavers with sand. After pushing sand around the floor, I wet it down to let the sand settle in the cracks.
08-18-2025 - Woke up this morning the same time as usual (0530) as the first full day as a family business. To tell you the truth, it feels pretty good. Today has been pretty busy. This morning I shaped the sides for the prototype, cut the ends and braces, cleaned up the shop floor after spreading sand yesterday and while I was waiting on some of my tools to arrive today, I mowed the grass and cleaned out the other shed so I can store my tools when they aren’t being used.
This afternoon some of the tools and supplies arrived (exciting event). I started looking over the supplies and then the table saw arrived by another carrier. I started assembling the rolling stand for the saw. As I was getting started, thunder started sounding in the background. I had to hurry to beat the storm. I started putting it together as the thunder was getting closer (oh, remember I am working in my outdoor shop), just let me get this thing together before it arrives.
Nope, ain’t gonna happen today. The storm arrived just before I was done. I had to keep going, add this section (POP goes the lightening with a boom), Oh #$@! I thought, one more section, now rain starts pouring down. I haven’t seen it rain this hard in a while but oh well. I moved the rest of my tools away from the edge of the shop to the center and continued to assemble the saw. Almost done, really pouring down and crackling all over the place. OK the stand is done, now attach the saw to the stand. Almost there, I tighten down the last bolt and nut and BOOM. That was really close, I took off for the house! BUT THE SAW IS COMPLETE….
08-19-2025 - Today was mostly administration, yesterday I put the table saw together, today I had to read and study on how to use it. I have read many manuals over my career, most having to do with software. I found out today that the manual for power tools is far more exciting than those of software. There are terms such as DANGER, CAUTION, and WARNING, these are a lot more serious than “beware of paper cut!”. There are terms and explanations for ripping wood, that is far more invigorating than “Click the enter key” or chasing mice pointers around. Anyways, this is a completely different world. BTW, my paint is coming in today, it won’t be used until my production version.
08-20-2025 - I finished setting up the saw guards, fence, and miter guide. I am ready to start ripping. I have already pre-cut the wood to length and needed the table saw to bevel the edges of both ends and braces. After running through several different pieces as practice and fit, I was ready and able to cut the actual pieces. They fit pretty good. The saw worked great, I couldn’t have made these cuts without it.
Next I had to rip two sheets of plywood from 4 feet to three feet wide. I purchased clamps and squared up the sheets and clamped the sheets together. For the rip, I bought a guide for my circular saw. I attached the saw to the rip guide and set it to 12 inches. It ripped both sheets effortlessly. I moved the plywood from the work bench.
I then moved my sides, ends and braces to the work bench to begin assembly. I attached the ends to the sides first and then the braces. My next move was to set the 8ft by 3ft sheet of plywood on the frame and tack it down. It is starting to look like a boat (all be it upside down) instead of a pile of wood.
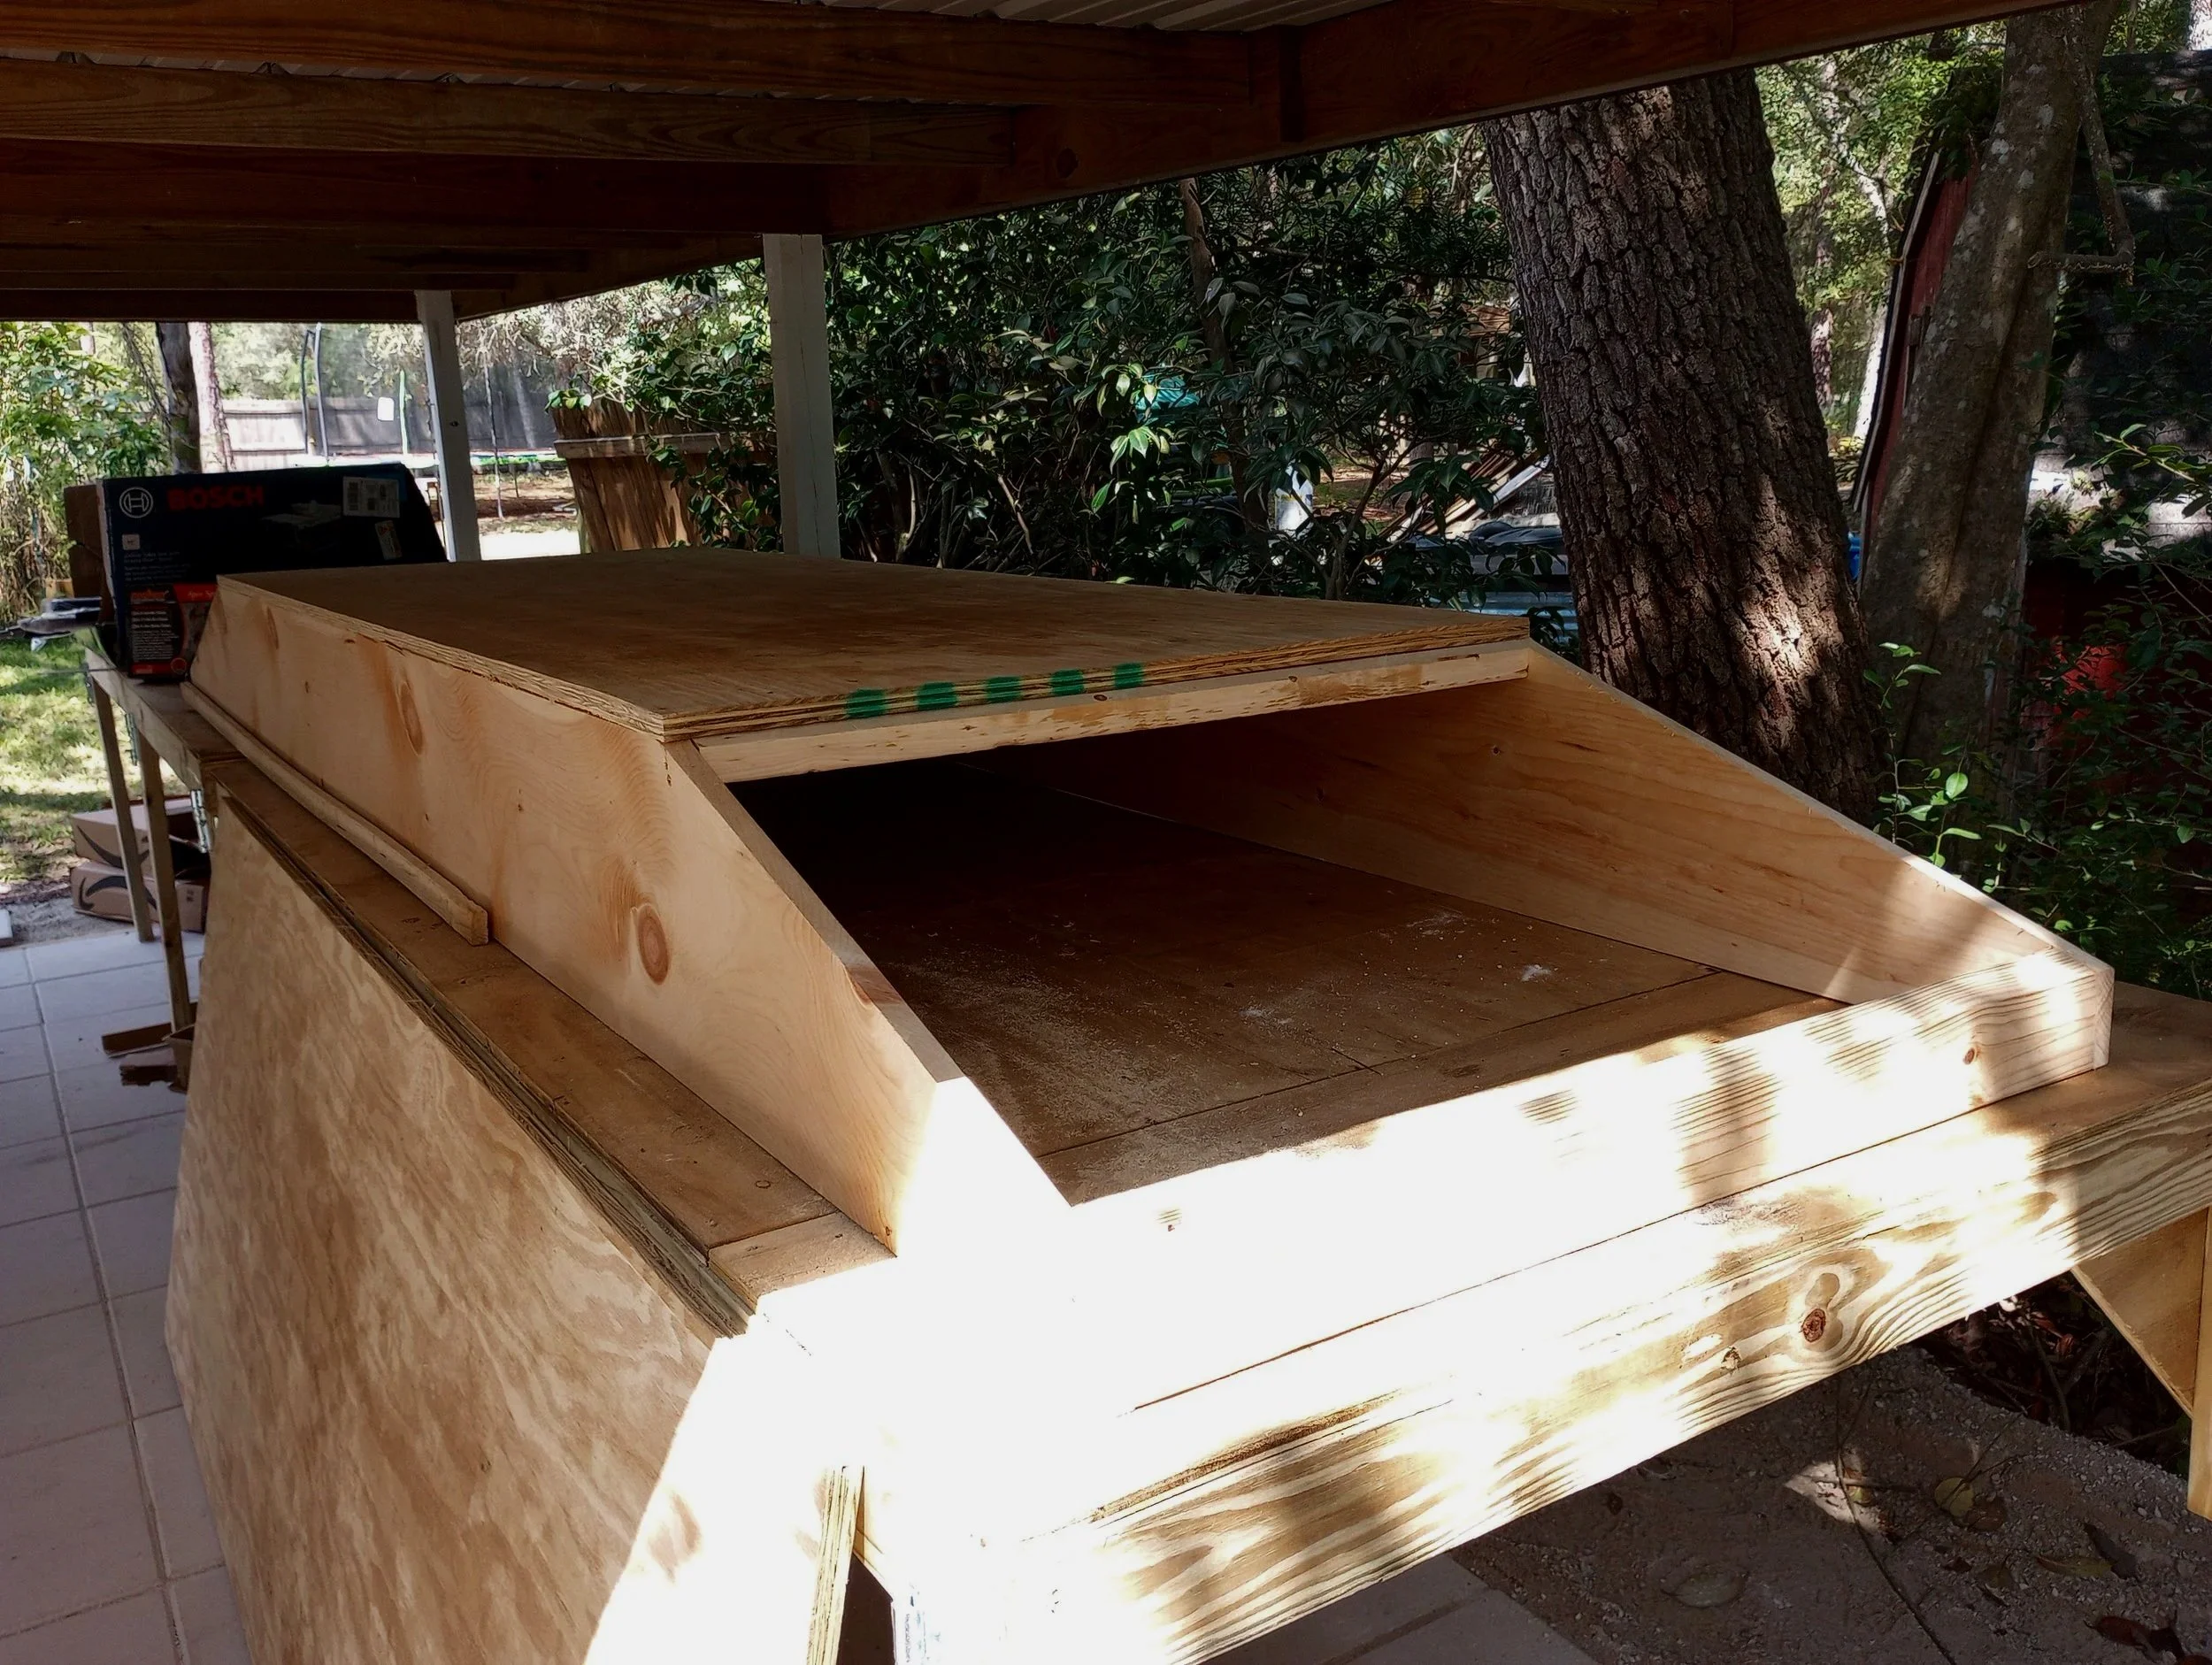
It is starting to look like a swamp boat.
08-21-2025 - I pretty much completed the prototype today. I cut my two end sections, beveled them and attached them to both ends. I then had to flip it over to add a 1x2 to the top edges of the sides to stiffen them up. That’s was a chore to do by one’s self. I got it most of the way. I got it down from the table, turned it around, got it back up onto the edge of the 3 ft high bench with the other end on the 2 ft high bench. That’s as far as I could get it, I had to call for reinforcements, my wife. She helped me earlier when I was cutting the end sections and now I needed her again to guide the end back onto the high bench.
I grabbed the low side and pushed the boat further onto the high side, my wife guided the other end to make sure it didn’t drop off the edge. We got it up. Now it was time to add the 1X2 pieces to stiffen up the sides. Using clamps, I did one side from two pieces of 1X2s and then the other. On one side I started from the left with an 8ft 1x2 and completed with a partial for the full length. On the other side, I started from the right with the full length so the seams are off set by 4 feet. Hopefully adding to the strength.
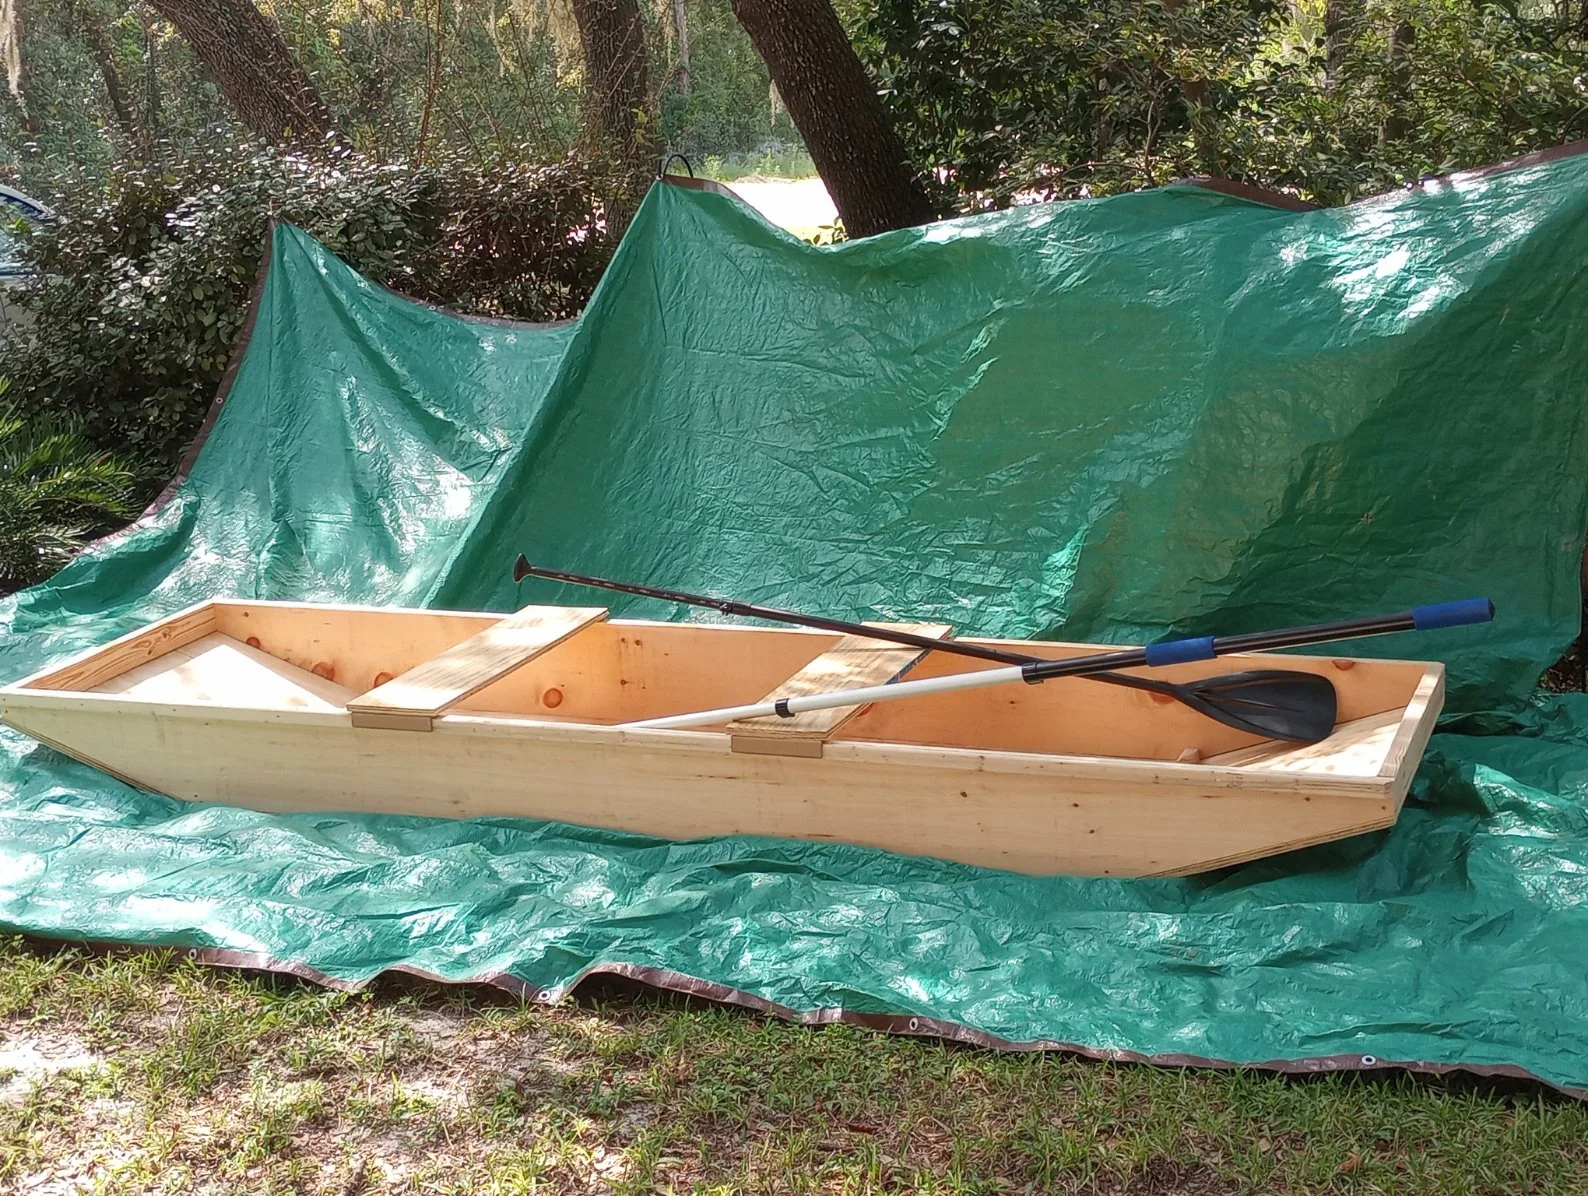
I then started the seats, since my hardware hasn’t arrived yet (currently being fabricated locally), I found use from the packing material for the table saw, they used paper angle pieces that resembles angle iron that is 1 1/2 X 1 1/2 inches (just about the perfect size). I cut them into four 9 inch sections. I measured from outside of rail on boat to outside rail.. I then cut a 12 inch section of plywood (left from ripping the 4ft sheets to 3 ft) into the proper length to fit across the boat, I then ripped those down from 12 inches to 10 inches. I attached the paper angel brackets to both ends and also attached support sections lengthwise and under the seat. They fit perfectly. I now have seats that I can move anywhere on the boat.
Yesterday, my telescoping push poles and paddles arrived. Just in time for final assembly. I broke those out to take a few pictures of what it would look like with the boat. The pictures are below. My hardware should be completed next week. I will start buying and getting in my production material.

Prototype complete.
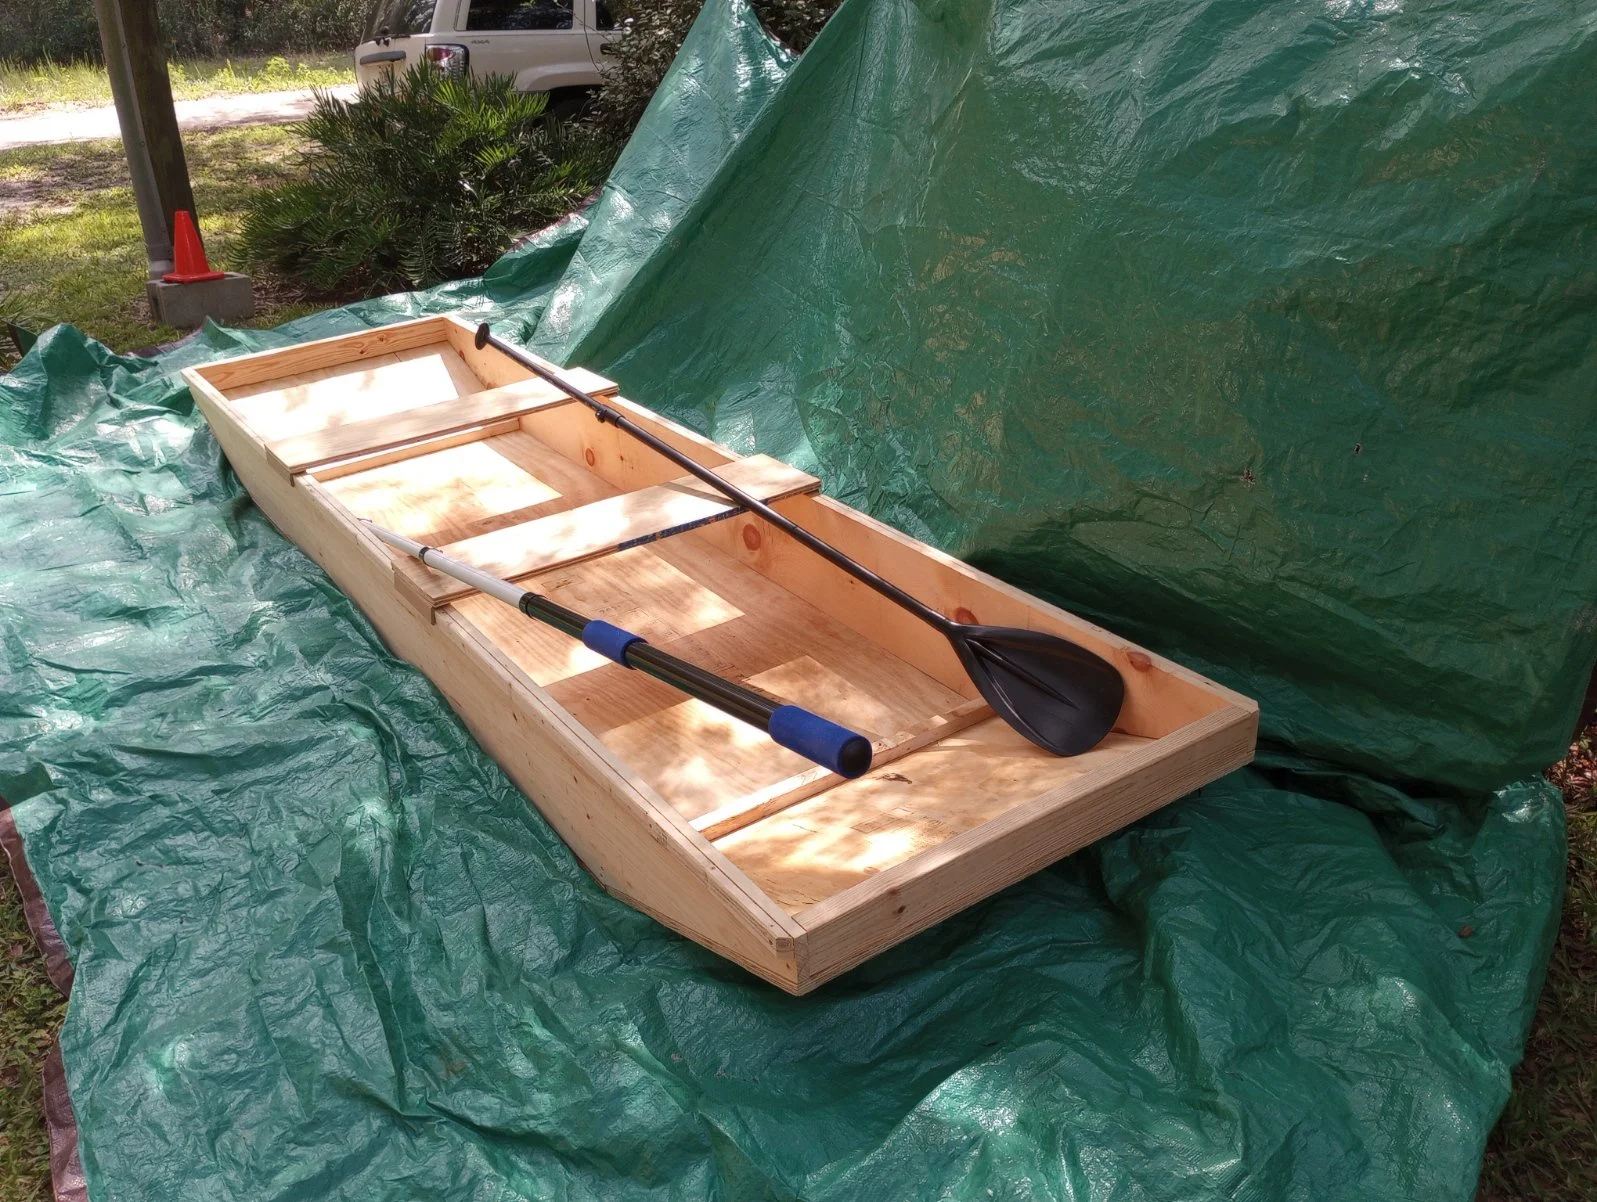
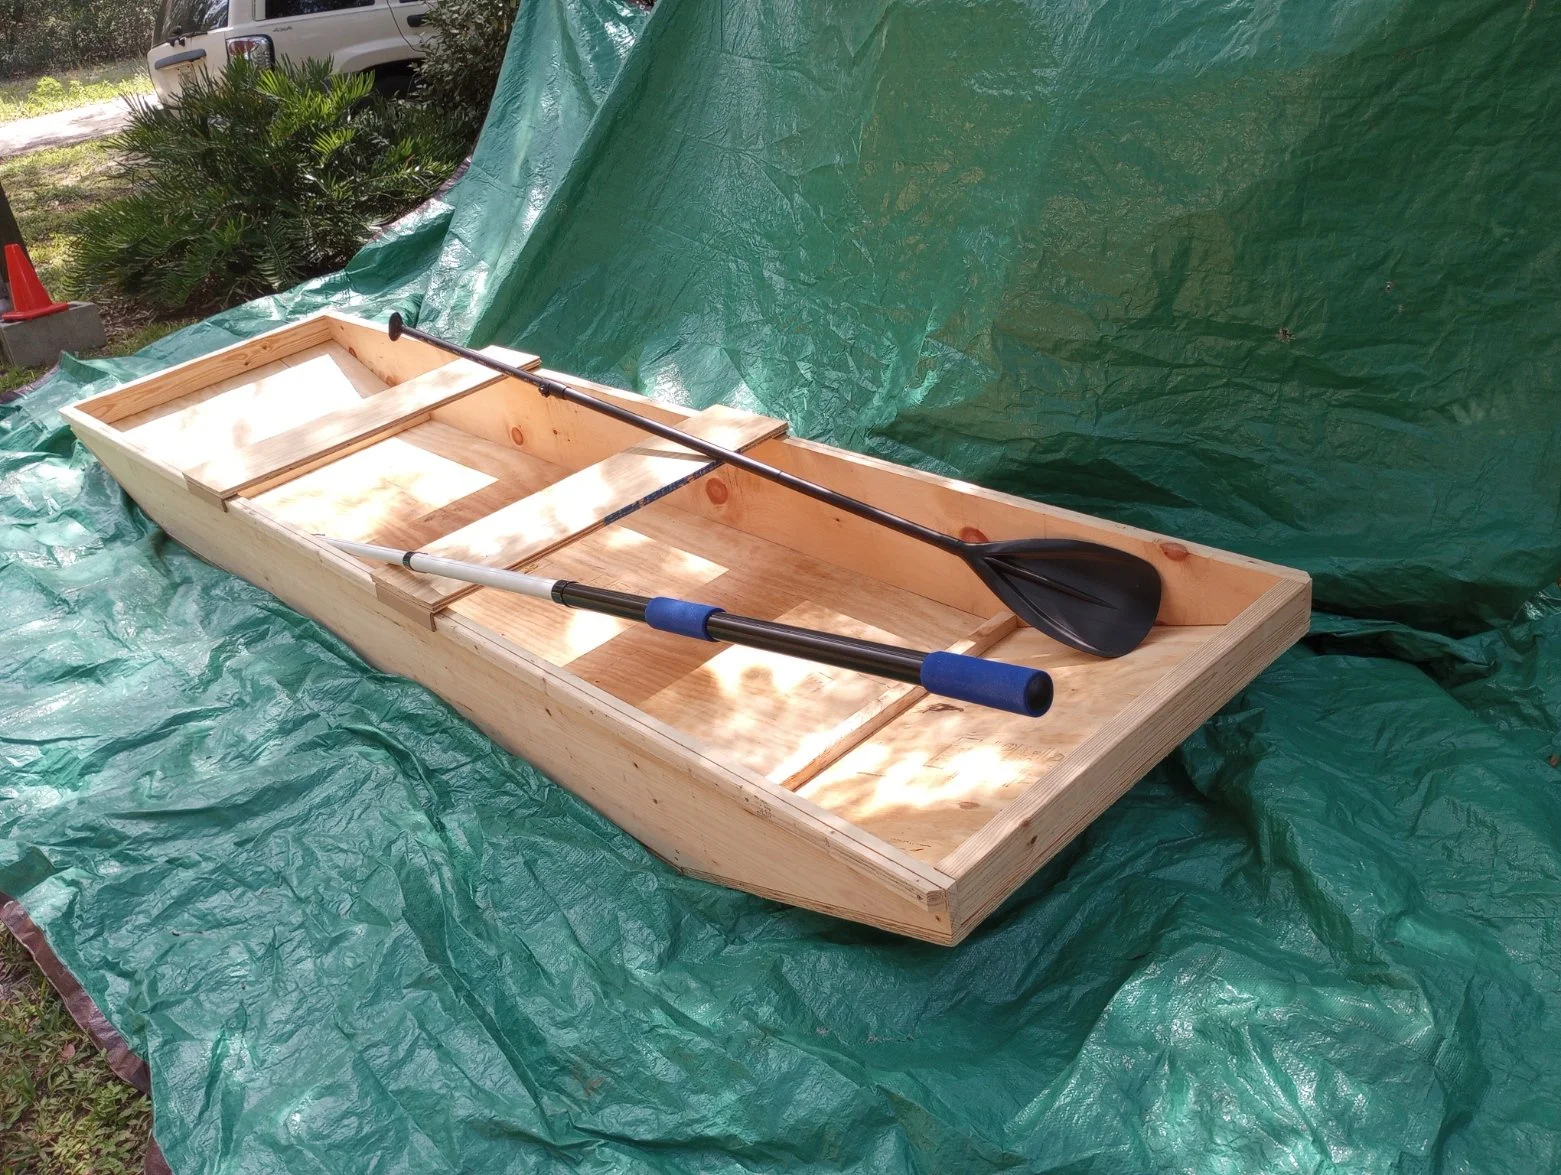
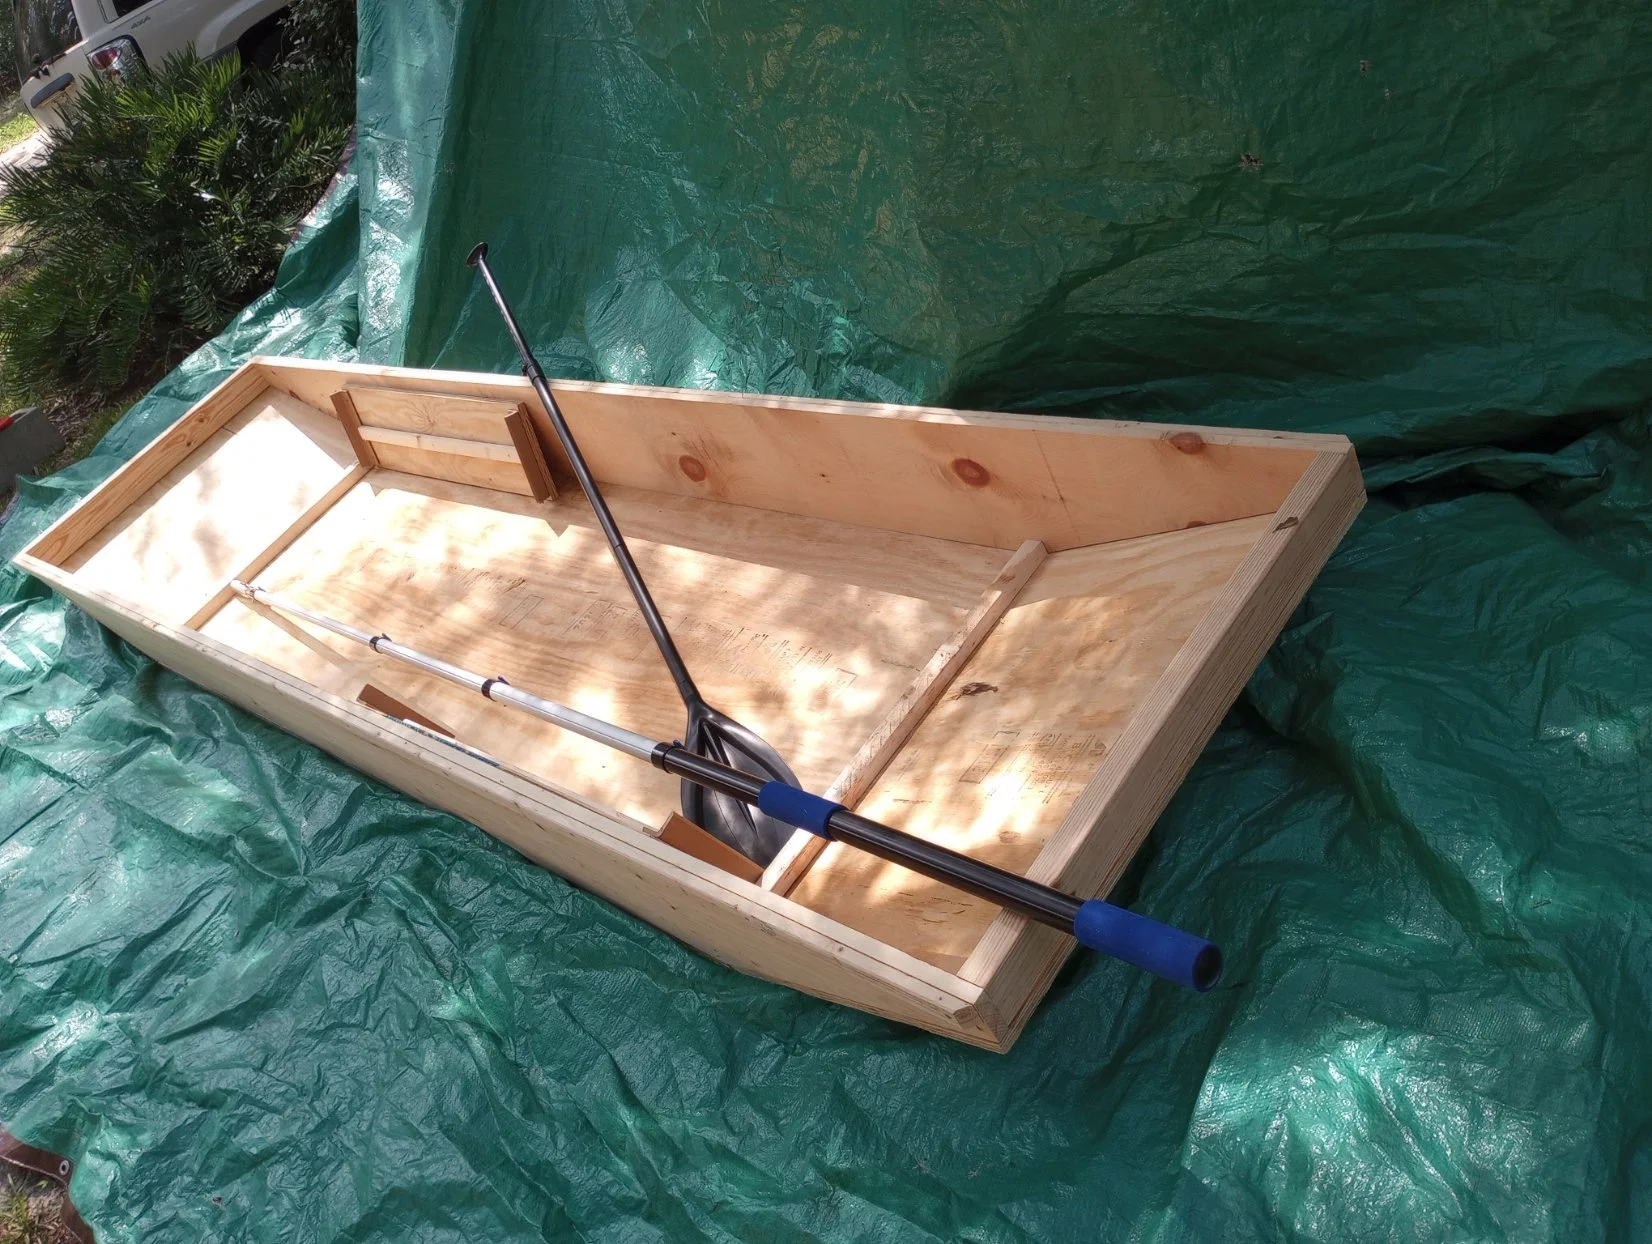
The photos above are the final renderings of the prototype, I sent these to be used as part of my logo and business cards by BrandWorks here in Keystone Heights.