
08/03/2025 - The shed, this is our humble start. This shed has always been used for cooking out and storing outdoor stuff like the lawn mower, fuel, paints, etc. Now it will have a new life.
The shed always had a dirt floor but we are going to put in pavers. You may ask ‘Why pavers, why not concrete?’. Good question, well we have some really big, beautiful oak trees and some of the roots run through the shed. If we put in concrete, we would have to cut some roots but that could hurt or kill the tree. and we don’t want that. We are going to put in paving sand first so there is room for the roots and lay pavers on top.
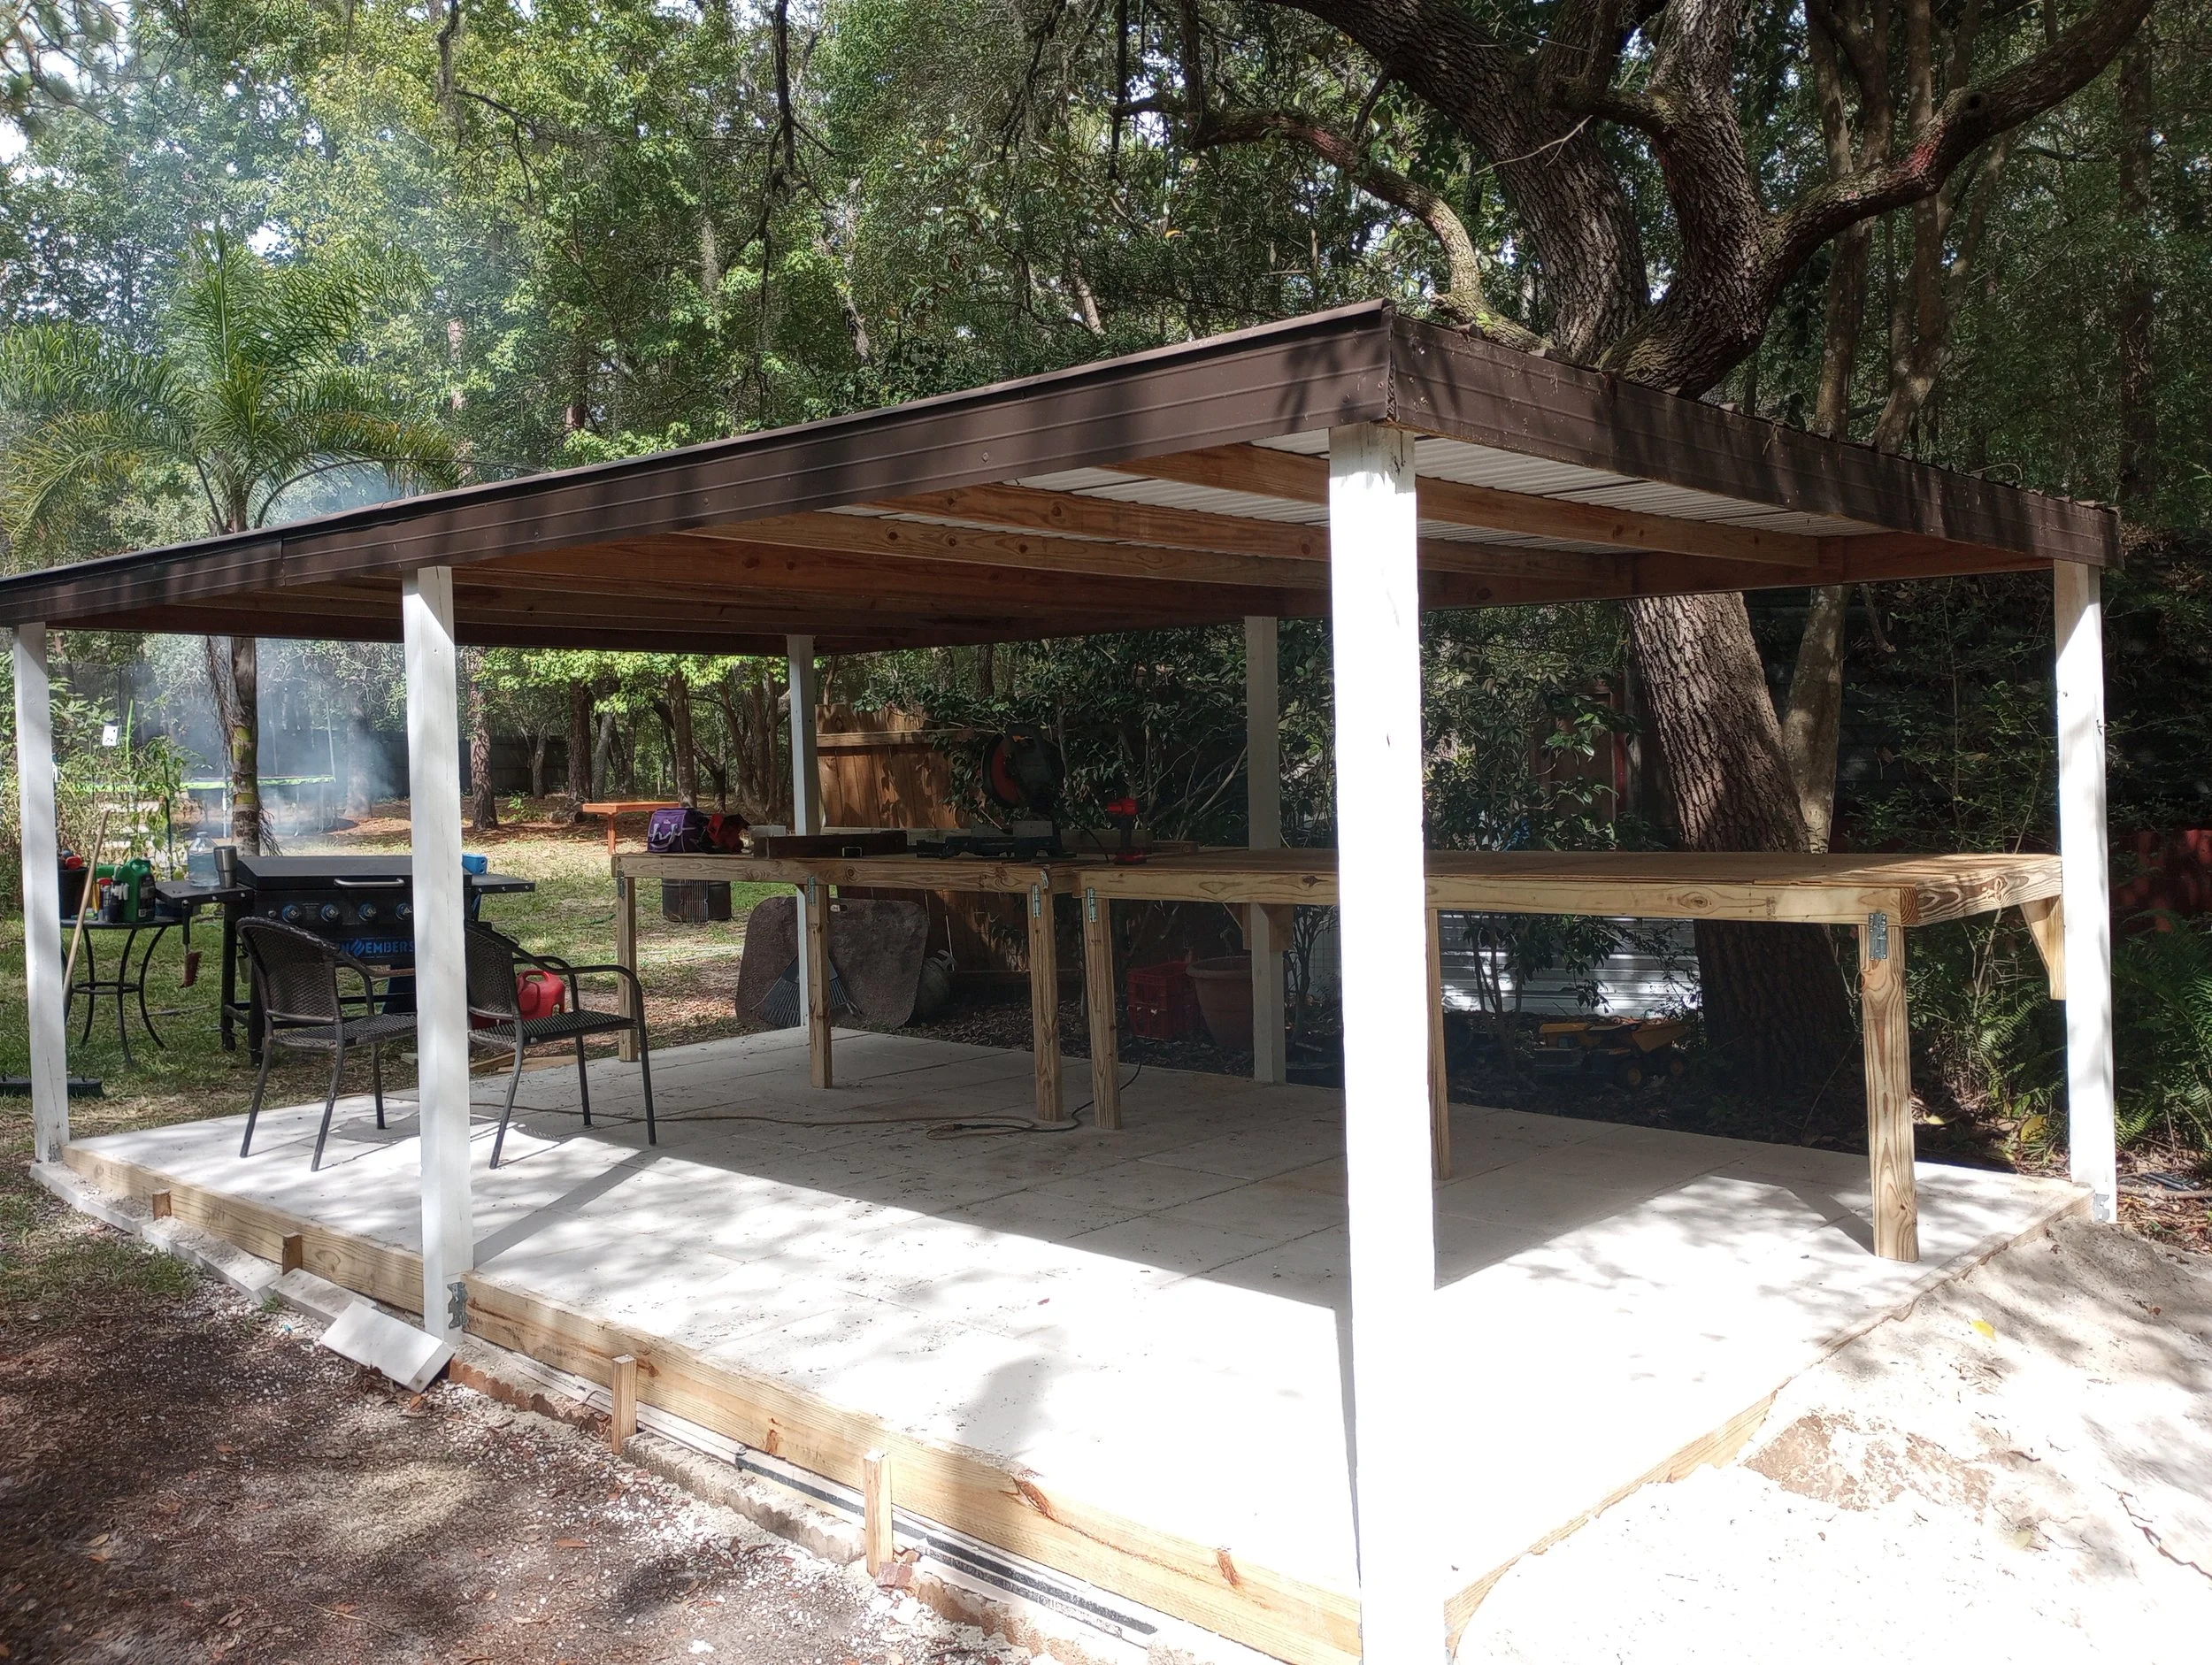
We are planning to put in work benches. The first two benches will be 4X10 and fold up into the wall when not in use. This will keep the floor space open when either is folded up. On the opposite side will be a 2X10 stationary work bench for tools and small detailing tasks. The grill will also have a space, we love cooking out.
I will add more photos as we progress in this build. Our long term plan is to have a large shop but this will do for the proof of concept and first build.


08/04/2025 - The paver dirt arrived and was dumped by the shed. It was only a half load but filled up a big section of my drive next the shed. The work began. Wheelbarrow after wheelbarrow was filled and dumped into the frame for the floor. My grandkids and wife helped out. We must have moved 20 to 25 wheelbarrow loads from the pile to the shed. Afterwards we spread it out the best we could and waited for our son in law (Joey) to get some time.
08/05/2025 - Our son in law, Joey, made us some time after his work was complete. Joey (we call him Joe Joe) is very good at what he does. He works in concrete and he has done several jobs for us, they turned out great but those are other stories.
Anyways, Joe Joe brought over a packer. He ran it across the base of the sand we put in. After his first run over it, he began using a concrete rake to level it out. After he completed the hand leveling, he ran the packer over it again. Now it is ready for placing in the pavers. The pavers will arrive on the 7th. There are 88 of them and each are 20X20X2 concrete, I think I’m going to need my back brace!
08/06/2025 - While I am waiting on the pavers to arrive tomorrow, I went to a business here in Keystone Heights named BRANDWORKS (BrandWorks4U.com). I needed help with my logo and business cards. I believe that I was talking with Gary Klopper, who is the Managing Director. He was very helpful and had some wisdom for me. I listened to his suggestions and agreed. They are working on a design based on my ideas. They should be ready to preview in a couple of days.


08/07/2025 - The pavers arrived, all 88 of them, none appeared to be broken. I had the Lowes delivery guy place them beside the shed. He did as expected. After he complete the delivery, I talked to him for a minute, I felt that I needed to warn him about where he was at and how to get out of here. We live at a tee in the road, you go to the right at the tee there is about a quarter mile of soft sugar sand. If you go to the left, it is shorter but there is a 90 degree turn of pure soft sugar sand. We have had to pull several vehicles out of these sand pits. I suggested to the delivery driver that he turn the truck and trailer around at the tee and head out the same way he came in. He started out listening to my advise, but as he was backing up, he hit a hump in the road and his tires slipped. Instead of trying again, he gave up and decided that he was going to take the left. I watched the truck head toward that 90 degree corner, make part of the turn and stop. That is where it sat for several hours, I guess until Lowes sent him a tow truck to pull him out.
Anyways, my pavers are here (he should have listened and he would have been home) and I get ready to start laying them down. For the solid run with no cuts they are 6 across and 11 down. Joe Joe did a great job the other day in leveling out the form, I just had to add a little here and there to get the pavers to the right height. After I laid the first run of 6 across and 11 down, the rest of the uncut pavers went down pretty quickly.
Now I was down to the last row and column (there’s my software side speaking again) and all need to be cut. Well I have a circular saw and a concrete blade so I start measuring the size of the paver and making the cuts. The first few of those went with no issues but my saw started sounding kind of funny. I completed a few more and the saw just keeps whining at me, stopping occasionally and making me restart my cut. Almost done, just two pavers left, my trusty saw just stops. I thought that maybe it had concrete dust on the motor, I have contact cleaner, so I went and got the contact cleaner and sprayed the motor end from the vented side of the saw.
I let it sit for a minute to evaporate the cleaner, WELL, that wasn’t long enough. I squeezed the trigger and poof, flames shot out everywhere. I dropped the saw and waited for another minute. Same thing. OK my saw is dead. Time for a new one. and just two pavers left to complete the floor.


08/09/2025 - Had a lot to do yesterday so I didn’t get anything done on the shed but we did manage to get to Lowes and get the lumber and hardware for the work benches and a new saw too. I completed the pavers first thing this morning. I used some paver sand and swept it across the pavers to fill in any gaps. I did this over and over again. After I completed filling in the gaps I washed off all of the excess. While the floor was drying, I started building the workbench frames. As I stated earlier, I need these work benches to stow in the wall to provide flexible working areas.
I started with the two 4X10 work benches, they will be three feet off the floor, but in order to stow them in the wall they have to pivot at two feet. I built four L shaped back legs with 1/2 inch plywood for support of the back leg. I used lag bolts to attach the back legs to the posts with 1 washer on the inside and two on the outside of the legs. After I attached the legs to the posts, I continued building the basic four sides of the bench frame.
After the basic four sides were ready, I started on the front legs of the work bench, there would be three front legs for support but they had to swivel up when the table was raised. For this I used 3 inch henges. To keep the leg locked in place I used gate locks so that the legs can’t fold in if bumped.
Now to secure it to the post when folded up, I had some left over rebar. It was about 3/8 inch, I cut it into 9 inch sections. I then lifted the frame into the wall, held it there and used a 1/2 inch drill to drill through the frame and into the post. I used the rebar to secure it in the upright position. I then let the bench back down to complete it’s construction.
I put the plywood top onto the first work bench and began using it as my work bench. Up to this point I had been using our picnic table as a workbench for cutting and prefabing what I needed. Now I can do it right here.
I repeated the above steps for the second work bench, it went much faster since I wasn’t having to walk half way across the yard for my cuts.
I now have a flexible workspace with benches that span 4X20, 4X10 or 0 based on what I need to accomplish. Today was an extremely busy day. Tomorrow, I will complete the third work bench that will be 2X10 and 2ft off the floor but still stowable in the wall. This bench would be used for my router table, table saw and other tools or needs.


08/10/2025 - After completing the other two benches yesterday, this morning I started the third. This is the 2X10 that is two feet off the ground. I originally thought that I would make this one stationary but after completing the other two, I decided to make this one stowable too. Now I have a flexible workspace and can go from 0 sq ft, to 20, 40, 60, 80 and 100 sq ft of workbench area. I still have a lot of little details to work on but I believe I can start my proof of concept boat. Over the next few days I will be getting my power tools and supplies.
I have already started one honey-do chore using the shop this afternoon. Our back door hand rail was falling apart. I had just enough lumber left over from the shop build to rebuild the hand rail. So I took off the original, got the measurements and angles, cut new pieces and painted them. I am waiting for them to dry before I reinstall.
08/11/2025 - Completed and reinstalled the hand rail. Afterwards I began spreading some of the left over paver sand around the outside frame of the shop (yes, it’s now a shop!). That took a lot of shoveling and hauling wheelbarrow after wheelbarrow. I lost count on how many. My before (a shed) and after (a shop) photos are below.

